
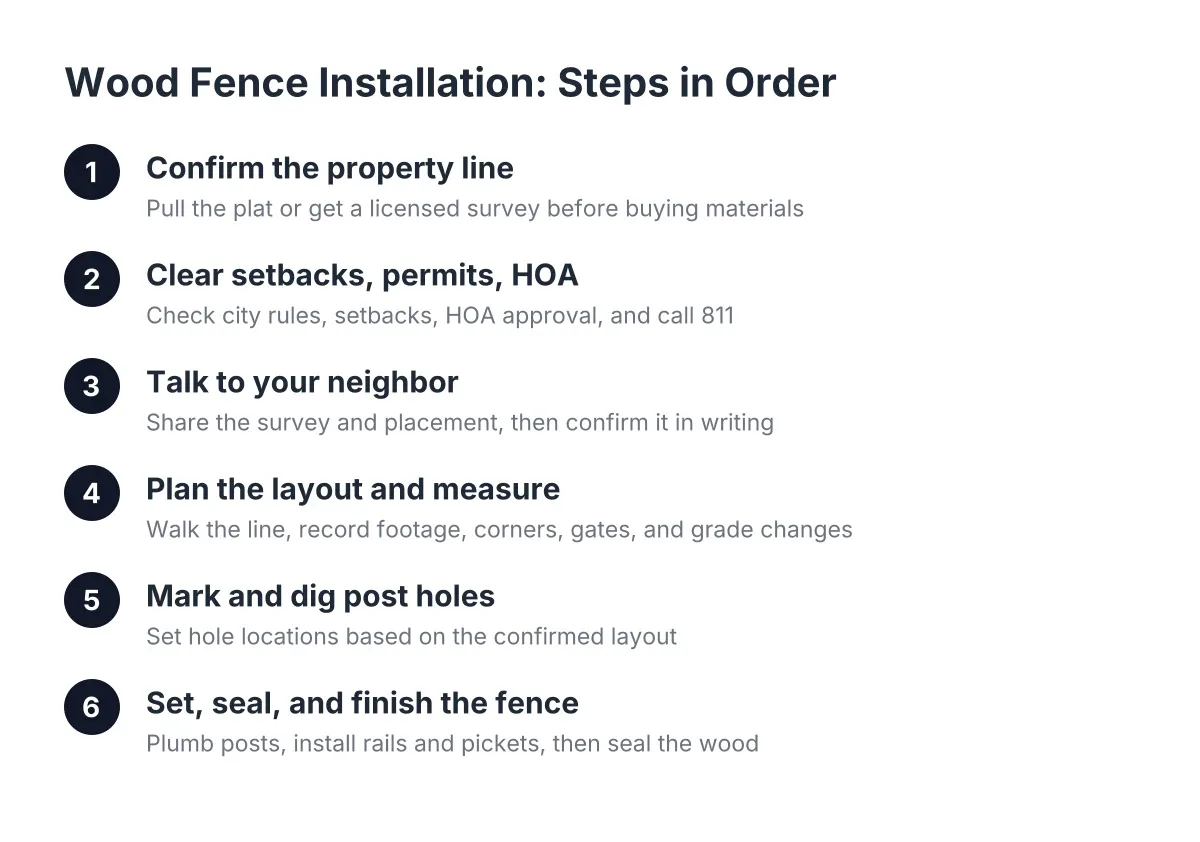
Step-by-Step Wood Fence Installation: What Happens Before Any Post Goes In
Most fence problems do not start with bad lumber. They start with a fence built two feet onto the wrong property. If you are planning a wood fence and you are not sure exactly where your property line sits, a fence property line survey becomes part of the step-by-step wood fence installation process that matters more to you than it does to almost anyone else. The physical build is the easy part. The steps before the digging are what keep you out of a dispute with your neighbor, your HOA, or the city of Knoxville.
This guide walks through the full process in order, the same sequence a professional crew follows and a careful DIYer should copy. Use it two ways: as a checklist if you plan to build the fence yourself, or as a way to judge whether a local fencing contractor is actually doing the work right. Either way, the order of the steps is the point. Skip Step 1 or Step 2 and everything after it can become a fence you pay to move.
Step 1: Confirm the Property Line Before You Buy a Single Board
Start with the legal boundary, not the fence style. Your property line is where the deed and the recorded plat say it is, not where the old fence stands, not where the neighbor mows, and not where a previous owner planted a hedge. In older in-town Knoxville neighborhoods especially, existing fences often sit a foot or more off the true line.
First, pull your plat from the Knox County Register of Deeds or check the KGIS parcel viewer for a general picture. However, GIS maps are not survey-grade. If the line is disputed, unclear, or the fence will run tight against it, hire a licensed surveyor to set pins as part of your fence property line survey. Yes, a survey is an added cost on top of the fence. It is also the cheapest insurance in this whole process. Suppose a homeowner in Fountain City builds 180 feet of privacy fence, then the neighbor produces a survey showing the fence crosses the line by 18 inches. In that scenario, the homeowner pays for the fence twice: once to build it, once to tear it out and rebuild it. A survey costs a fraction of that.
Keep the survey, the plat, and dated photos of the pins in one folder. That documentation is what protects you if a question comes up years later, after the neighbor sells and someone new moves in with different opinions.
Step 2: Clear Setbacks, Permits, and HOA Approval
Next, confirm you are allowed to build where you plan to build. Three different authorities can have a say, and they do not talk to each other.
- City or county rules. Knoxville and Knox County regulate fence height, especially in front yards and on corner lots where sight lines at intersections matter. Check current requirements before you finalize the design; rules can change, so verify what applies in 2026 rather than trusting an old forum post.
- Setback requirements. Some zoning districts and subdivisions require a fence to sit a set distance off the line. Others allow building right up to it. Know which situation you are in before you mark post locations.
- HOA approval. If you live in a community with an HOA, get written approval of the fence style, height, material, and placement before any work starts. Boards commonly regulate which side faces out, stain color, and whether a privacy fence is allowed at all.
For HOA boards and property managers replacing a community perimeter or amenity fence, this step runs in reverse: you are the approving authority, but you still need the survey and setback review, because a common-area fence that encroaches on a member's lot creates the same dispute at a larger scale.
In addition, call 811 before digging. Utility locates are free, required, and non-negotiable. Hitting a gas or fiber line turns a fence project into an emergency.
Step 3: Talk to Your Neighbor and Put Placement in Writing
A fence on or near a shared line affects two households, so treat the conversation as part of the build. Show the neighbor the survey, the planned placement, and which direction the finished side will face. If the fence sits entirely on your side of the line, you do not need their permission, but you do want their understanding.
Therefore, after the conversation, send a short follow-up email: here is where the fence will go, here is the survey, here is the start date. That one email prevents the most common neighbor dispute, which is not about the fence itself but about who agreed to what. If you and the neighbor are splitting cost on a true line fence, put the cost split, maintenance responsibility, and placement in a signed agreement. Handshake deals on shared fences age badly.
Step 4: Plan the Layout and Measure the Run
Now measure. Walk the fence line with a long tape or measuring wheel and record the total linear footage, every corner, every gate location, and every grade change. An online fence calculator will convert that footage into a rough material count, posts, rails, and pickets, which is useful for budgeting whether you build or bid it out.
East Tennessee lots complicate this step. Sloped yards in the foothills force a choice between a stepped fence, where each panel drops like a stairstep, and a racked fence that follows the grade. Stepped looks crisp but leaves triangular gaps under panels; racked keeps the bottom tight to the ground, which matters if you have a dog. Decide now, because the choice changes how posts are set and how much material you need.
While you plan, this is also the moment to settle style. Standard flat-face privacy fence is the baseline. Board-on-board, shadow box, and horizontal wood fence ideas look sharper but take more pickets and more labor for the same footage, so they cost more for a real reason, not markup. If budget is tight, inexpensive privacy fence ideas usually mean standard pressure-treated pickets in a flat-face layout rather than exotic styles.
Step 5: Mark and Dig the Post Holes
Stretch a string line between stakes at each corner, then mark post locations along it, typically every 8 feet for a privacy fence. Posts anchor everything, so this is where DIY projects most often go wrong in Knoxville soil.
Red clay and rock are the local reality. Clay holds water against posts, and rock stops augers cold. A standard rule is to bury posts at least a third of their above-ground height, commonly around 2 feet or more for a 6-foot privacy fence, and below the local frost depth. Dig the hole wider at the bottom than the top if you can; a bell-shaped footing resists frost heave better through East Tennessee freeze-thaw winters.
When you hit rock, you have options: a heavier auger, a digging bar, or shifting the post a few inches and adjusting panel widths. Professional crews budget time for rock. DIYers who do not often end up with shallow posts, and shallow posts are why fences lean after the first wet spring.
Step 6: Set the Posts Plumb and Let Them Cure
Set each post in the hole, pour concrete, and check plumb on two faces with a level while the concrete is wet. Crown the concrete slightly above grade and slope it away from the post so rain sheds off instead of pooling around the wood. Standing water at the post base is the number one cause of rot and future fence repair calls.
Then wait. Concrete needs time to cure before posts take the load of rails and pickets. Rushing this step is a classic DIY mistake; a post nudged out of plumb while the concrete is green stays crooked forever.
Step 7: Install Rails and Pickets, Step by Step, for a Straight Wood Fence
With posts cured, attach the horizontal rails, then the pickets. The step-by-step sequence on a wood fence here is simple but exacting: run a string line along the top, set the first picket plumb, and check alignment constantly. Before fastening each new section, hold it up and confirm its top lines up level with the section before it. Small errors compound over 100 feet.
A few professional habits worth copying:
- Place any cut or shortened sections in the least visible part of the yard, and save full panels for the stretch facing the street or the neighbor.
- At a corner where a full panel will not fit, measure the gap, cut a section to size, and add a picket at the corner to hide the cut edge.
- On horizontal designs, cover board splices with a vertical trim strip for a clean finish.
- Leave a small gap under pickets so the wood is not wicking moisture off wet ground.
Gates come last and deserve extra care. Gate posts carry constant swinging load, so many installers set them deeper or in larger footings. A sagging gate is the first thing to fail on a wood fence in a wet Knoxville spring, and gate installation done right at the start prevents most of it.
Step 8: Seal the Wood and Set a Maintenance Schedule
Finally, protect the investment. Let pressure-treated lumber dry out before staining, then apply a quality stain or sealer and plan to reapply every few years. In East Tennessee humidity, an unsealed wood fence grays, cracks, and starts rotting at the ground line well before a maintained fence does. Walk the line once a year, check posts for movement, and catch small problems while they are still fence repair instead of fence replacement.
Understanding Fence and Property Line Survey Decisions for DIY Installation
Can a homeowner handle wood fence installation alone? Physically, yes, if the lot is flat, the soil cooperates, and the run is short. The honest comparison is not skill, it is time and risk. According to Angi, professionally installed wood fencing runs about $11 to $45 per linear foot, with typical projects landing between $1,920 and $4,820. DIY saves most of the labor portion of that, but you absorb the rock you hit at hole number six, the posts that lean after a storm, and any placement mistake on your fence property line and survey boundaries.
A reasonable split: homeowners with boundary questions, sloped ground, HOA requirements, or long runs get the most value from a fence company, because a good local fencing contractor should ask about the survey and flag placement risks before digging. Short, flat, clearly interior runs are fair DIY territory. One caution either way: no installer can resolve a genuine boundary dispute for you. If you and the neighbor disagree about the line itself, that is a question for a licensed surveyor, and sometimes a real estate attorney, before anyone sets a post.
Why the First Three Steps of a Wood Fence Matter Most
Steps 4 through 8 can be fixed with money and a weekend. Steps 1 through 3 cannot. A fence set on the wrong side of a line, built without HOA approval, or placed inside a setback is a fence with a legal problem attached, no matter how plumb the posts are. Whether you build it yourself or put the project out for bids, judge the process by how seriously it treats the survey, the setbacks, and the written record. The fence that never has to move is the one that was placed right the first time.
If you need wood fence installation, Knoxville Fence Builders can help.
Prefer to talk it through? Call (865) 419-3997 — a quick call is usually the fastest way to get a straight answer for your situation.