
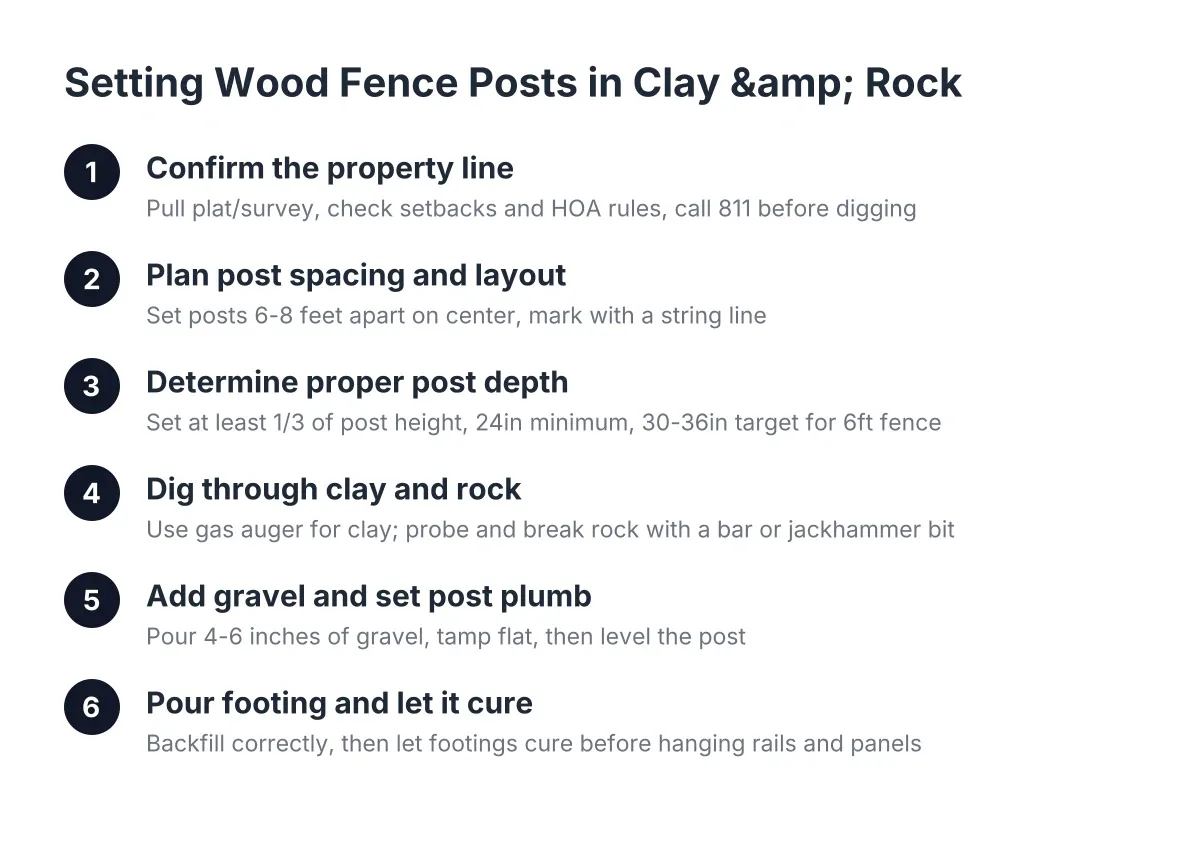
Wood Fence Post Setting in Knoxville Clay and Rocky Soil: Depth and Methods
If you are planning a wood fence in Knoxville, the posts decide whether the whole project holds up. Wood fence post setting in East Tennessee is harder than the national how-to videos make it look. Red clay holds water against the post, rocky pockets stop a digger cold, and freeze-thaw winters work on anything set too shallow. This guide walks through the process step by step, with the depth targets and methods that match our ground, not sandy soil somewhere else. Getting the fence post depth right is critical to a fence's longevity in this region.
One more thing before you dig. If you are putting this fence near a property line, where the posts go matters as much as how deep they go. Step 1 covers that first, because moving a fence after a neighbor dispute costs far more than setting it right the first time.
Step 1: Confirm the Property Line Before You Mark a Single Post
Do not guess at the boundary. If you set posts based on an old fence, a line of trees, or what the neighbor remembers, you risk paying twice: once to build the fence and again to move it.
First, pull your plat or survey from your closing documents; most recent Knoxville home purchases include one. If the markers are gone or the line is unclear, a licensed surveyor can set pins. Yes, a survey adds cost on top of the fence. However, it is cheap insurance compared to rebuilding a fence line, and the documentation protects you if a disagreement comes up later.
Next, check three things in writing:
- Any setback rules from your local zoning office, since some areas require fences to sit inside the line by a set distance
- HOA rules on fence placement, height, and material, and get the approval before posts go in
- Which side of the line the fence sits on, agreed with the neighbor, ideally by email so you have a record
In addition, call 811 before digging. Utility locates are free, and hitting a buried line turns a weekend project into an emergency. A good local fencing contractor will ask about the survey and HOA approval before quoting, so have those answers ready.
Step 2: Plan Post Spacing and Mark Your Layout
Set your posts 6 to 8 feet apart on center. A privacy fence with solid panels catches wind like a sail, so 6-foot spacing gives it a stronger frame. A picket-style wood fence or a split rail fence can usually run 8 feet.
Stretch a string line between stakes at your two corner points, then measure and mark each post location along the string. Sloped lots, which are common in the foothills around Knoxville, complicate this. Decide now whether the fence will step down in level sections or rack to follow the grade, because that choice changes where panels land and how each post height gets cut.
Step 3: Understanding Proper Fence Post Depth in East Tennessee Soil
Wood fence posts should be set at least one-third of the post's above-ground height into the ground, with a practical minimum of 24 inches and a target of 30 to 36 inches for a 6-foot privacy fence. In East Tennessee, deeper is better, because freeze-thaw cycles and saturated clay push shallow posts loose over time. The right fence post depth prevents movement caused by clay saturation and seasonal frost action.
Here is the simple math. A 6-foot privacy fence needs a post about 8 feet long: 6 feet above grade, 2 to 3 feet below, plus room for gravel at the bottom of the hole. Gate posts should go deeper and heavier than line posts, since every swing of a gate levers against them. East Tennessee's frost line is shallow compared to northern states, but spring rain loading on wet clay does the same damage frost heave does elsewhere.
Hole diameter matters as much as depth. Dig the hole about three times the width of the post, so a 4×4 post gets a hole 10 to 12 inches across. Dig it as a straight cylinder, not a cone that tapers at the bottom. A cone-shaped hole leaves thin concrete at the base, which is exactly where the post needs the most support.
Step 4: Dig Through Clay and Rock Without Wrecking Your Timeline
Knoxville soil rarely cooperates. On one lot you hit dense red clay that sticks to the auger like dough. Two streets over, you hit shale or chert rock at 18 inches and the auger just spins.
For clay, a two-person gas auger or a hydraulic auger on a skid steer works, but keep a digging bar and clamshell diggers handy to clean out the sticky spoil. For rock, the approach changes:
- Probe each marked location with a digging bar before renting equipment, so you know what you are up against
- Use a rock bar or jackhammer bit to break through thin rock layers
- If solid rock sits shallower than your target depth, widen the hole and plan for more concrete to compensate, or shift the post location slightly if layout allows
- Never stop at a shallow hole and hope; a post set 14 inches deep in rock debris will lean within a few seasons
This digging difficulty is one of the biggest cost factors in local wood fence installation quotes. Suppose a homeowner in a new subdivision off Hardin Valley gets two quotes that differ by a wide margin for the same 200 feet of privacy fence. In that scenario, the gap often comes down to one contractor pricing for rock and one assuming easy digging, then charging extra when the auger hits chert. Ask every fence company how they handle rock before you sign.
Step 5: Add Gravel, Then Set the Post Plumb
Pour 4 to 6 inches of gravel into the bottom of each hole and tamp it flat. This does two jobs. It gives the post a stable base to rest on, and it lets water drain away from the end grain instead of pooling under the post. In clay soil that drains slowly, this gravel layer is the difference between a post that dries out and one that sits in a bucket of water.
Set the post on the gravel and check it with a level on two adjacent faces. Then backfill a few inches of loose soil around the base and tamp it firmly to hold the post plumb on its own. Do not pour concrete into an unsupported hole and try to hold the post straight while it sets; brace it or tamp it stable first. Recheck plumb and check the post height against your string line. If a post sits taller than the line, it is not deep enough, so pull it and dig rather than planning to trim the problem away later.
Step 6: Pour the Footing and Backfill Correctly
Tamping dirt alone around the post is not an acceptable method for a wood privacy fence in this soil. Wind load on solid panels plus wet clay movement will loosen a dirt-set post. Use a concrete footing, mixed to a firm consistency rather than soupy, and fill the hole to a few inches below grade.
Slope the top of the concrete away from the post so rain sheds off instead of pooling against the wood. This step matters because concrete can trap moisture against the post and speed up rot if water collects at the surface. Some installers prefer a crushed-gravel backfill for exactly that reason; it drains better, though it takes thorough tamping in stages to match the stiffness of concrete. Either way, compaction is the point. Posts loosen over time mainly because the backfill around them was never packed tight.
Finish with a thin layer of topsoil over the concrete so grass can grow flush along the fence line. It looks cleaner and hides the footing.
Common Wood Fence Post Setting Mistakes to Avoid
- Cone-shaped holes that leave thin concrete at the bottom
- Skipping the gravel base, which leaves the post end sitting in trapped water
- Pouring wet, soupy concrete that shrinks and cracks
- Backfilling without tamping, which leaves cavities that let the post rock
- Setting gate posts at the same depth as line posts
Step 7: Let the Footings Cure Before Hanging Rails and Panels
Give the concrete time to cure before you load the posts, generally one to three days depending on the mix and the weather. Rushing this step on a humid Knoxville week pulls posts out of plumb before the footing can hold them. Once cured, run your rails, attach pickets or panels, and cut post tops to a consistent line. Caps or angled cuts on top of each post shed water and slow rot at the exposed end grain.
When to Set Posts Yourself and When to Call a Pro
A handy homeowner can set posts for a short run on flat, clear ground. However, three situations push most people toward professional wood fence post setting: shallow rock across the fence line, a sloped lot that needs stepped or racked panels, and any fence going close to a disputed or uncertain property line. Gate installation is also less forgiving than line posts, since a sagging gate is the first thing everyone notices.
Cost-wise, professional wood fence installation runs about $11 to $45 per linear foot according to Angi, with typical projects landing between $1,920 and $4,820. Rocky digging, long runs, gates, and slope work push a project toward the top of that range. If you are comparing quotes in 2026, ask each contractor three questions: how deep they set posts, what they do when they hit rock, and whether they use gravel under the post. The answers tell you more about fence quality than the price does.
Set deep, drain well, tamp hard, and confirm the line before the first hole. Get those four things right and a wood fence in East Tennessee clay will stand straight for decades instead of leaning by its third spring.
If you need wood fence installation, Knoxville Fence Builders can help.
Prefer to talk it through? Call (865) 419-3997 — a quick call is usually the fastest way to get a straight answer for your situation.